
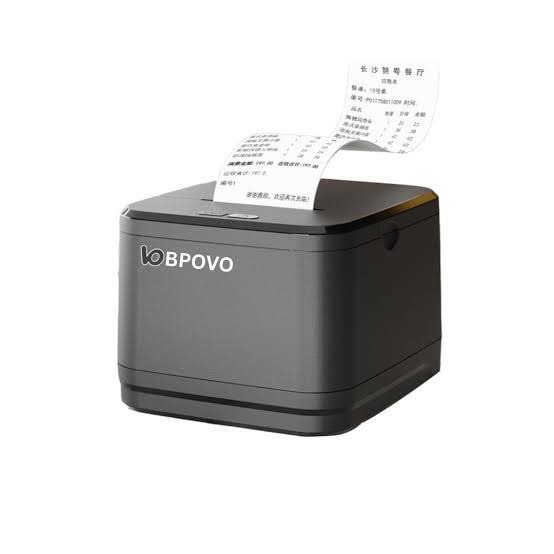
Thermal printers are widely used in retail stores, restaurants, warehouses, healthcare facilities, manufacturing plants, and logistics operations. They help businesses print receipts, product labels, shipping documents, barcodes, and other important information quickly. Their relatively simple printing process makes them convenient for frequent commercial use, but they can still experience technical problems that affect printing quality and daily operations.
Common issues include faded printing, blank receipts, paper jams, incorrect label alignment, barcode scanning failures, and connectivity errors. Understanding the causes of these problems can help users identify suitable solutions and reduce unnecessary equipment downtime. Whether used for receipt printing or product identification, a properly maintained Thermal Printer can provide consistent results when operated with compatible materials and appropriate settings.
Understanding How Thermal Printers Work
Before troubleshooting common problems, it is useful to understand the basic printing process.
Thermal printers use a heated printhead to produce text, graphics, and barcodes. There are two main types of thermal printing technology:
Direct thermal printing: This method uses specially coated paper or labels that react to heat. The printhead activates selected areas of the material to create the printed image. It does not require ink, toner, or a ribbon.
Thermal transfer printing: This method uses a ribbon containing transferable ink. Heat from the printhead transfers the ink onto compatible paper or synthetic label materials.
Both technologies depend on proper media installation, clean components, and suitable operating settings. A problem with any of these factors can affect the final output.
1. Faded or Light Printing
<AsyncImage query=”thermal receipt printer faded light print receipt compared with dark clear receipt” aspectRatio=”16:9″ width=”100%”/>
Faded printing is one of the most common thermal printer problems. Text may appear too light, barcodes may lack sufficient contrast, or some sections of a label may be difficult to read.
Possible Causes
- Incorrect print darkness settings.
- Low-quality or incompatible thermal paper.
- Dirty printhead surfaces.
- Worn printhead elements.
- Printing speed that is unsuitable for the media.
Effective Troubleshooting Methods
Start by checking the printer’s darkness settings. If the output is consistently too light, increase the setting gradually and print a test sample.
Next, confirm that the paper or label material is compatible with the printer. Low-quality thermal media may not react consistently to heat.
Clean the printhead using the method recommended by the manufacturer. If the problem continues in the same areas after cleaning, the printhead may require professional inspection.
Avoid setting the darkness level excessively high because unnecessary heat can contribute to printhead wear.
2. Printer Produces Blank Receipts or Labels
A thermal printer may feed paper correctly but produce completely blank output. This problem is often related to media orientation, compatibility, or printhead operation.
Possible Causes
- Thermal paper loaded with the wrong side facing the printhead.
- Incompatible printing material.
- Incorrect ribbon installation in a thermal transfer printer.
- Damaged printhead.
- Software or driver communication problems.
Effective Troubleshooting Methods
For a direct thermal printer, check whether the heat-sensitive side of the paper faces the printhead. Some thermal paper rolls can be installed incorrectly, preventing the material from reacting to heat.
You can test the paper by gently scratching a small area with a fingernail. Compatible heat-sensitive paper should produce a dark mark. This is only a basic check and does not replace confirming media specifications.
For thermal transfer printers, inspect the ribbon installation and make sure it is correctly positioned.
If the media and installation are correct, print a self-test page if the printer supports this function. A successful self-test may indicate that the issue is related to the connected software or device rather than the printer itself.
3. Paper Jams and Feeding Problems
<AsyncImage query=”thermal receipt printer paper jam paper roll feeding mechanism open printer” aspectRatio=”16:9″ width=”100%”/>
Paper jams can interrupt printing and prevent employees from completing transactions or generating labels. They may occur when paper is incorrectly loaded or when debris interferes with the feeding mechanism.
Possible Causes
- Incorrect paper roll dimensions.
- Misaligned paper during installation.
- Damaged or wrinkled media.
- Dust or adhesive residue inside the paper path.
- Worn platen roller.
- Incorrectly closed printer cover.
Effective Troubleshooting Methods
Turn off the printer before removing jammed media. Open the cover according to the manufacturer’s instructions and carefully remove loose paper without pulling forcefully against the mechanism.
Check the roll for wrinkles, torn edges, or other damage. Replace unsuitable media and reload the new roll according to the correct orientation.
Inspect the platen roller and paper path for visible debris. If the roller is damaged or does not move smoothly, it may need replacement.
Do not use sharp objects to remove stuck paper because they can damage internal components.
4. Missing Lines or Uneven Printing
Sometimes a printer produces receipts or labels with thin blank lines running through the printed content. These defects can make text difficult to read and interfere with barcode scanning.
Possible Causes
- Dirt or residue on the printhead.
- Damaged heating elements.
- Uneven contact between the printhead and platen roller.
- Poor-quality printing media.
- Excessive wear from frequent use.
Effective Troubleshooting Methods
Clean the printhead carefully using an approved cleaning method. Check the platen roller for visible damage or contamination.
Print a test sample after cleaning. If the same blank lines appear repeatedly in the same positions, one or more printhead elements may be damaged.
In this situation, contact a qualified technician or arrange replacement using a compatible printhead.
5. Barcode Printing and Scanning Failures
<AsyncImage query=”thermal barcode label printer printed barcode labels close up scanner reading barcode” aspectRatio=”16:9″ width=”100%”/>
Barcode readability is essential in retail, logistics, warehousing, and manufacturing. A barcode that looks acceptable on paper may still fail when scanned if its dimensions, contrast, or spacing are incorrect.
Possible Causes
- Insufficient print darkness.
- Incorrect barcode dimensions.
- Low print resolution.
- Unsuitable label material.
- Printing speed that reduces image quality.
- Incorrect barcode formatting.
- Poor scanner compatibility.
Effective Troubleshooting Methods
First, check whether the barcode format and dimensions meet the requirements of the scanning system.
Adjust print darkness gradually if the barcode lacks sufficient contrast. Review the printer’s resolution and select a suitable speed for the required level of detail.
Use compatible labels and inspect the printhead for contamination or wear.
Most importantly, test sample barcodes using the actual scanners used in daily operations. This helps confirm that printed codes are reliably readable rather than relying only on visual inspection.
6. Labels Printing in the Wrong Position
Label printers may occasionally produce content that is shifted, cut off, or printed across multiple labels. This can result in wasted materials and incorrect product identification.
Possible Causes
- Incorrect label dimensions configured in software.
- Misaligned label guides.
- Incorrect sensor settings.
- Inaccurate gap detection.
- Incorrect media calibration.
Effective Troubleshooting Methods
Check the label dimensions configured in the printer driver or label design software. Make sure they match the actual width and height of the installed media.
Inspect the label guides and adjust them so the roll moves straight through the printer.
If the printer supports automatic calibration, run the procedure according to the manufacturer’s instructions. This helps the device detect label gaps, black marks, or other positioning indicators.
Also confirm that the correct media mode is selected for continuous paper, gap labels, or black-mark labels.
7. Thermal Transfer Ribbon Problems
Thermal transfer printers require a ribbon to transfer ink onto compatible labels. Incorrect ribbon installation or unsuitable materials can result in poor printing quality.
Common Symptoms
- Ribbon wrinkles.
- Smudged printing.
- Incomplete image transfer.
- Ribbon breaking during printing.
- Uneven print darkness.
Possible Causes
- Incorrect ribbon installation.
- Unsuitable ribbon and label combinations.
- Incorrect ribbon tension.
- Excessive printhead temperature.
- Damaged or poor-quality ribbon.
Effective Troubleshooting Methods
Check the ribbon path and confirm that the supply and take-up rolls are installed correctly.
Make sure the ribbon width is suitable for the label material and printer model. Select a compatible ribbon type based on the substrate and durability requirements.
Adjust print darkness and speed according to the manufacturer’s guidance. If wrinkles continue, inspect the ribbon alignment and tension mechanism.
8. Printer Not Detecting Paper or Labels
Some thermal printers may display a paper-out or media error even when a roll is installed.
This can happen when sensors cannot detect the printing material correctly.
Possible Causes
- Dust or adhesive residue on sensors.
- Incorrect media type selected.
- Improper label positioning.
- Damaged sensors.
- Incorrect paper roll installation.
Effective Troubleshooting Methods
Open the printer and check whether the paper is installed correctly. Remove any visible debris from accessible sensor areas using the recommended cleaning method.
For label printers, verify that the sensor is positioned appropriately for the label format.
Review the printer settings to ensure the selected media mode matches the installed material.
If the printer still cannot detect the roll, the sensor may need professional inspection.
9. Printer Not Connecting to the Computer or POS System
A thermal printer may function correctly on its own but fail to receive printing commands from a connected computer, POS terminal, or mobile device.
Possible Causes
- Loose or damaged connection cables.
- Incorrect network settings.
- Outdated or incompatible drivers.
- Unsupported operating system.
- Incorrect printer selection in the software.
- Wireless connection problems.
Effective Troubleshooting Methods
Start by checking the physical connection. For USB printers, make sure the cable is securely connected and try another compatible port if necessary.
For Ethernet or Wi-Fi printers, confirm that the device is connected to the correct network. Check the network configuration and verify that the POS system can communicate with the printer.
Review the installed driver and confirm that it matches the printer model and operating system.
If using Bluetooth, check that the devices are properly paired and within the supported connection range.
10. Printer Produces Smudged or Blurry Output
Smudged or blurry printing can affect the readability of receipts, labels, and barcodes. This problem may be related to the printing material, ribbon, or equipment settings.
Possible Causes
- Unsuitable thermal paper or label material.
- Incorrect printhead temperature.
- Excessive printing speed.
- Ribbon and substrate incompatibility.
- Contaminated printhead.
- Poor-quality consumables.
Effective Troubleshooting Methods
Use media that meets the printer manufacturer’s specifications. For thermal transfer printing, verify that the ribbon is suitable for the selected label material.
Clean the printhead and review the darkness and speed settings. Make small adjustments and test the output after each change.
If the printed image remains blurry, check whether the label surface is compatible with the printing method.
11. Printer Overheating or Stopping During Heavy Use
Thermal printers used in busy retail stores, restaurants, and warehouses may experience heavy workloads. Some models may pause or display an error if internal temperature limits are reached.
Possible Causes
- Continuous high-volume printing.
- Insufficient ventilation.
- Excessive print darkness.
- Unsuitable operating conditions.
- Internal component problems.
Effective Troubleshooting Methods
Allow the printer to cool if it displays an overheating warning. Check that ventilation openings are not blocked and that the device is installed in a suitable location.
Review the manufacturer’s recommended operating temperature and printing specifications.
Avoid unnecessary high-darkness settings, as these can increase printhead heating. If overheating happens repeatedly under normal workloads, arrange a technical inspection.
12. Printer Makes Unusual Noises
Unusual clicking, grinding, or repeated mechanical noises may indicate a problem with the paper-feeding system or another internal component.
Possible Causes
- Paper incorrectly loaded.
- Foreign objects inside the printer.
- Worn rollers or gears.
- Damaged feeding mechanism.
- Loose internal components.
Effective Troubleshooting Methods
Turn off the printer and disconnect the power before inspecting accessible areas. Remove loose paper scraps and check for visible obstructions.
Reload the media and make sure the cover is securely closed.
If the noise continues, avoid operating the printer unnecessarily. A qualified technician should inspect the internal mechanism to prevent further damage.
13. Printer Keeps Disconnecting During Operation
Repeated disconnections can interrupt printing workflows, especially when the device is connected to a POS system or shared network.
Possible Causes
- Unstable Wi-Fi connection.
- Damaged USB or Ethernet cable.
- Network configuration changes.
- Power supply interruptions.
- Driver or firmware compatibility issues.
Effective Troubleshooting Methods
Check the power supply and connection cables first. If the printer uses a wireless network, verify signal strength and confirm that the printer remains connected to the correct network.
For network-connected devices, review the printer’s IP configuration and any relevant network changes.
Restarting the printer and connected POS device may resolve temporary communication problems. If disconnections continue, check the manufacturer’s support documentation for model-specific troubleshooting steps.
14. Preventive Maintenance to Avoid Common Problems
<AsyncImage query=”technician cleaning thermal label printer printhead with cleaning swab maintenance” aspectRatio=”16:9″ width=”100%”/>
Many thermal printer problems can be reduced through regular maintenance. Cleaning the printhead, using suitable media, and checking the feeding mechanism can help maintain consistent output.
A practical maintenance routine may include:
| Maintenance Task | Suggested Frequency |
|---|---|
| Check paper or label supply | Daily or before use |
| Inspect printed output | Daily or regularly |
| Remove visible dust and debris | Weekly or as needed |
| Clean printhead | According to usage and manufacturer guidance |
| Inspect platen roller | During routine cleaning |
| Check sensors and label alignment | During routine maintenance |
| Inspect cables and connections | Monthly or as needed |
| Review drivers and firmware | Periodically |
The exact frequency should depend on printing volume, environmental conditions, and the manufacturer’s recommendations.
15. When to Seek Professional Thermal Printer Repair
Not every printer problem can be solved through basic troubleshooting. Some issues involve damaged electronic components or mechanical parts that require specialized tools and technical knowledge.
Professional service may be necessary when:
- The printhead remains defective after proper cleaning.
- The printer repeatedly overheats.
- Internal rollers or gears are damaged.
- Sensors fail to detect compatible media.
- Power problems continue after checking the adapter and connections.
- Mechanical noises persist.
- The printer displays recurring hardware errors.
Attempting complex repairs without suitable experience may cause additional damage or affect the equipment warranty. Businesses should follow manufacturer service instructions and use qualified technicians when necessary.
Best Practices for Maintaining Reliable Thermal Printing Performance
In addition to troubleshooting individual problems, businesses can improve equipment reliability through consistent operating practices.
Use Compatible Consumables
Select paper, labels, and ribbons designed for the specific printer model and printing technology.
Follow Manufacturer Instructions
Use the recommended cleaning materials, settings, and maintenance procedures.
Train Employees
Teach staff how to load media correctly, recognize common errors, and perform basic cleaning.
Monitor Printing Quality
Check receipts and labels regularly to identify defects before they affect large printing batches.
Maintain Suitable Operating Conditions
Keep printers away from excessive heat, moisture, dust, and direct sunlight.
Keep Spare Supplies Available
Maintain an appropriate stock of compatible paper, labels, and ribbons to prevent interruptions caused by supply shortages.
Conclusion
Thermal printer problems can affect business productivity, transaction processing, barcode scanning, and product identification. Common issues such as faded printing, blank receipts, paper jams, label misalignment, ribbon errors, and connectivity failures often have straightforward causes that can be identified through systematic troubleshooting.
Regular printhead cleaning, correct media installation, suitable printing settings, and routine equipment inspections help prevent many avoidable problems. When an issue involves damaged components or persistent hardware errors, professional repair is the safer option.
By combining proper maintenance with practical troubleshooting methods, businesses can maintain consistent printing quality and keep their thermal printing equipment operating reliably across everyday applications.